
Purpose
In this article, we will cover how to create a tracker in FreshDesk. A tracker allows you to link related tickets and better manage updates surrounding that issue.
Linking a ticket to a tracker
In Freshdesk, you can find the option to link tickets in the right-side navigation.
Step 1: Click the link icon or click to expand and reveal the Linked Tickets button.
Step 2: Click to create tracker or link to an existing tracker, as appropriate.

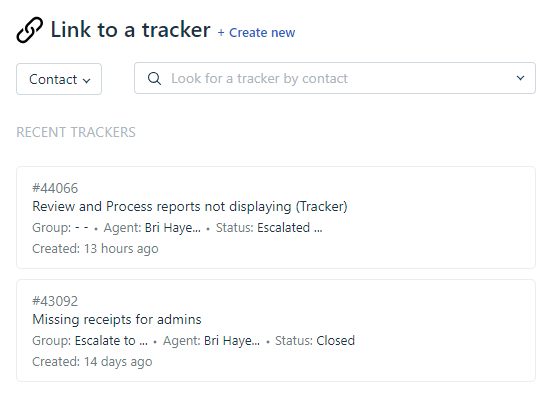
If creating a tracker, you will enter all the ticket details and save.

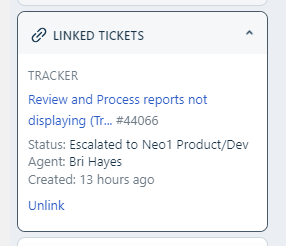
Step 3: Once linked to a tracker, the ticket will say Related in the top and the linked tickets detail will be found in the right-hand navigation.

Step 4: Once a tracker is created, you can manage settings (set do not end NPS, click trigger to reopen and update comment) and close the related tickets (if appropriate) and the tracker will remain open.
You can view which tickets are related to the tracker ticket by visiting the linked tickets area within the tracker (right-hand navigation).

Broadcasting updates for linked tickets
A broadcast will allow you to communicate updates surrounding tracker resolution via all related tickets. The agent (owner) of the related ticket will receive the broadcast as a note in the related ticket.
Step 1: Broadcast a message from the tracker ticket by clicking the Broadcast button below the ticket description.

Step 2: Type your update and then click Broadcast. This can be an informal update, or can be a message crafted to be a response to the customers in the related tickets.

Step 3: Once a Broadcast message is sent to confirm the issue is resolved, please update the customers via the appropriate related tickets. The tracker ticket can be closed once the related tickets are closed. If the related ticket must remain open due to other items that remain unresolved, please unlink.
